 ONTEA
ONTEA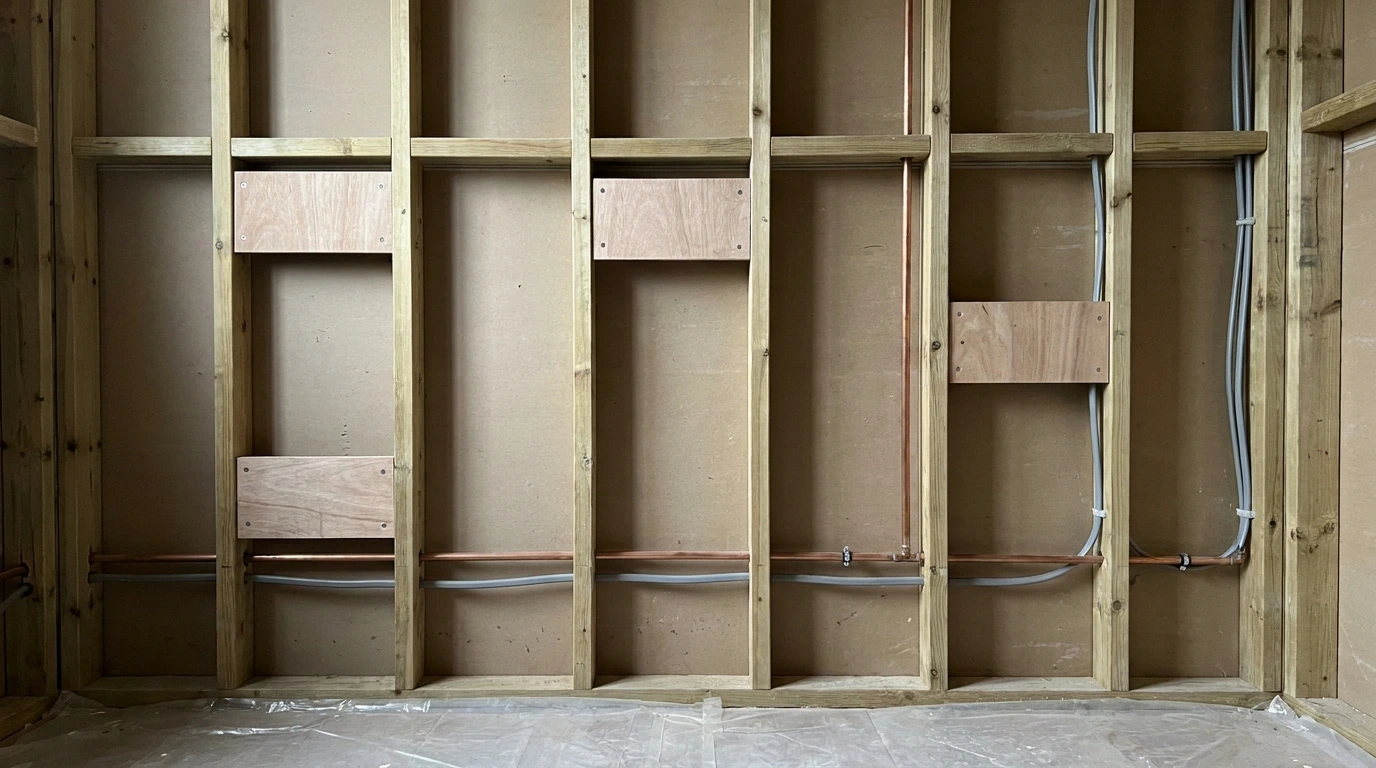
A towel rail, robe hook or shelf stays secure only when its fixing, substrate and backing are specified as carefully as its visible finish. On a hotel or rental project, decide where the loads go before the wall is boarded and tiled. Do not leave the installer to guess where a stud, nogging or pattress might be.
This is a specification and coordination guide for architects, contractors, developers and fit-out teams. It is not a substitute for the selected accessory's installation sheet, the partition manufacturer's system details or the judgment of a competent installer. For material failure modes, see our guide to stainless steel versus chrome bathroom accessories.
Key Takeaways
- Treat wall backing as part of the accessory schedule, not as a late installation detail.
- Match the fixing to the actual substrate, tile build-up, accessory geometry and expected use.
- A2 and A4 are useful stainless fastener shorthand, but exposure and the complete assembly still decide the specification.
- Photograph and measure backing before wall closure, then include the record in the handover pack.
Why wall backing decides whether an accessory stays secure
Wall backing gives the fixing a dependable load path into the structure behind the finish. Plasterboard, tile and adhesive may form the visible wall, but they are not automatically a suitable substitute for designed backing. A rail can look perfectly aligned on day one and still loosen when wet towels are pulled from it, a shelf is loaded or a hook is used repeatedly.
The right question is not simply, “Which plug should we use?” Start with the whole assembly:
- What is the accessory's fixing-point layout?
- What wall build-up sits behind the tile or panel?
- Where will the load and leverage travel?
- Which fixings are supplied or approved by the manufacturer?
- Can the position be inspected, repaired or replaced later?
Towel rails, robe hooks and decorative shelves are not grab rails or other safety-critical support equipment. If an item is intended to take a person's body weight or assist a transfer, it needs a separate structural design and specification. Do not use a bathroom accessory schedule as a substitute for that work.
Use the partition manufacturer's details, the accessory installation sheet and the project engineer's requirements to define that support. Exact details depend on the wall, fitting and project requirements.
Start with the wall build-up and room schedule
Before choosing a fixing, identify what is behind the finished surface. Record whether each location is masonry, a timber stud partition, a metal stud partition, a service void, a tiled board system or a lining over another wall. The same accessory can need a different fixing detail in each condition.
Set out the schedule from approved room elevations and the selected accessory's template. Include:
- Room, wall elevation and accessory reference
- Finished height, centre lines and fixing centres
- Wall build-up and board or tile thickness
- Backing type, size and location
- Fixing material, diameter and length
- Nearby pipes, cables, membranes and movement joints
- Finish, cleaning instructions and replacement reference
- Installer responsible for the backing and final fitting
Freeze these locations before boarding. A late change from a 600 mm rail to a compact 320 mm rail can move the fixing centres. A shelf may need a wider backing zone than a hook. A robe hook beside a shower may also need a different moisture and sealing detail from one on a bedroom-side bathroom door.
Coordinate the schedule with plumbing and electrical drawings. Mark no-drill zones around concealed services and protect waterproofing details. Do not assume that a convenient-looking tile joint identifies a safe fixing position.
Add backing before the wall is closed
Backing should be installed while the structure remains visible. On a timber stud wall, that may mean noggings or continuous timber support between studs at the approved accessory locations. On a metal stud wall, it may mean a designed plywood pattress or a proprietary support component compatible with the partition system. On masonry, the key task is selecting an anchor for the actual wall and accounting for the tile and adhesive build-up.
There is no universal backing thickness or fixing length that suits every towel rail, shelf and partition. Planned support is safer than an improvised board fixing, but the partition manufacturer, accessory instructions and project engineer must define the detail.
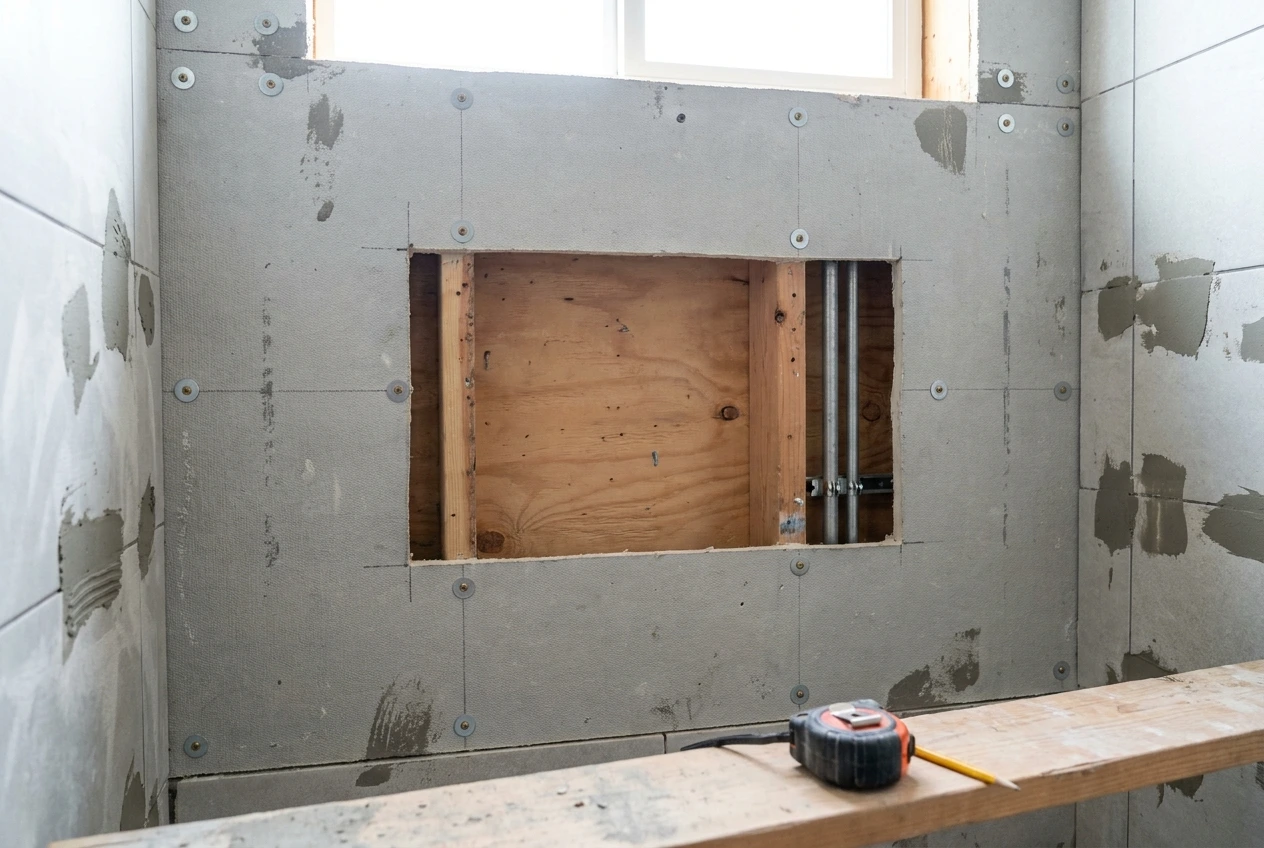
Inspect the open wall before it disappears:
- Place the approved template against the drawing's reference lines.
- Confirm the backing covers every fixing point, not only the centre of the accessory.
- Check that screws will not meet pipes, cables or a service void.
- Confirm the finished wall thickness, including tile, adhesive and any waterproofing layer.
- Photograph the backing with a tape measure and permanent reference points visible.
- Store the photograph with the room elevation and accessory schedule.
The photograph is evidence of location, not proof that an unsuitable anchor or screw has become suitable. It gives the next trade and future maintenance team a starting point when the backing is hidden.
Match fixing to accessory, substrate and exposure
Use the selected product's installation instructions first. A fixing that works in masonry may be wrong for a metal-stud lining. A screw that reaches backing through paint may be too short after tile, adhesive, waterproofing and a thick mounting plate are included. Confirm the required embedment and edge distances for the actual system rather than selecting by appearance.
A2 and A4 are stainless fastener groups used for an initial specification pass. The British Stainless Steel Association explains that A2 fasteners broadly correspond to the 304 family, while A4 fasteners broadly correspond to the 316 family. Those are practical groups, not exact one-to-one alloy identities. Strength class and corrosion environment remain separate questions.
For an ordinary, sheltered internal bathroom, an A2 or 304-family fixing may be a reasonable direction when the complete assembly and manufacturer instructions support it. For coastal, pool, spa or other chloride-influenced environments, an A4 or 316-family direction gives more margin. The BSSA's comparison of 316, 304 and 303 stainless steels is clear that 316 is more resistant than 304 in marine conditions, not immune to corrosion.
Also review contact between different metals. Moisture trapped at a bracket, screw or concealed plate can create a maintenance problem even when the visible accessory looks sound. The BSSA guide to bimetallic corrosion explains why material pairing, isolation and the environment need to be considered together.
Do not write “stainless fixings” as the whole fixing specification. Record the fastener group, head type, length, washer or isolation detail where needed, anchor, substrate and approved installation method.
Detail towel rails, robe hooks and shelves separately
The accessory category describes appearance. The installation detail describes how the room will behave. Substrate means the structural wall or partition receiving the anchor, behind the visible board, tile or panel.
Towel rails
A towel rail has a long lever arm and can receive a damp towel, repeated pulling and cleaning contact. Set out every mounting point from the approved product drawing. Check the rail's projection against the shower screen, door swing and circulation route. Make sure backing extends across the full fixing pattern, not only behind one wall post.
A rail that folds, swings or swivels introduces moving joints and needs clearance to move without striking a screen, wall or adjacent fitting. If a room needs that movement, the FONTEA accessory range does not currently publish a folding towel rail, so the assembly has to come from a product designed to move or the detail has to accept a fixed bar. The FONTEA wall-mounted towel rail, 320 mm is a fixed 320 mm bar in AISI 304 stainless steel, and its page states that the projection and fixing detail are not recorded. Check the projection against the shower screen and door swing on the selected product's own data, because a fixed bar still needs room for a towel to hang and for a cloth to be passed behind it.
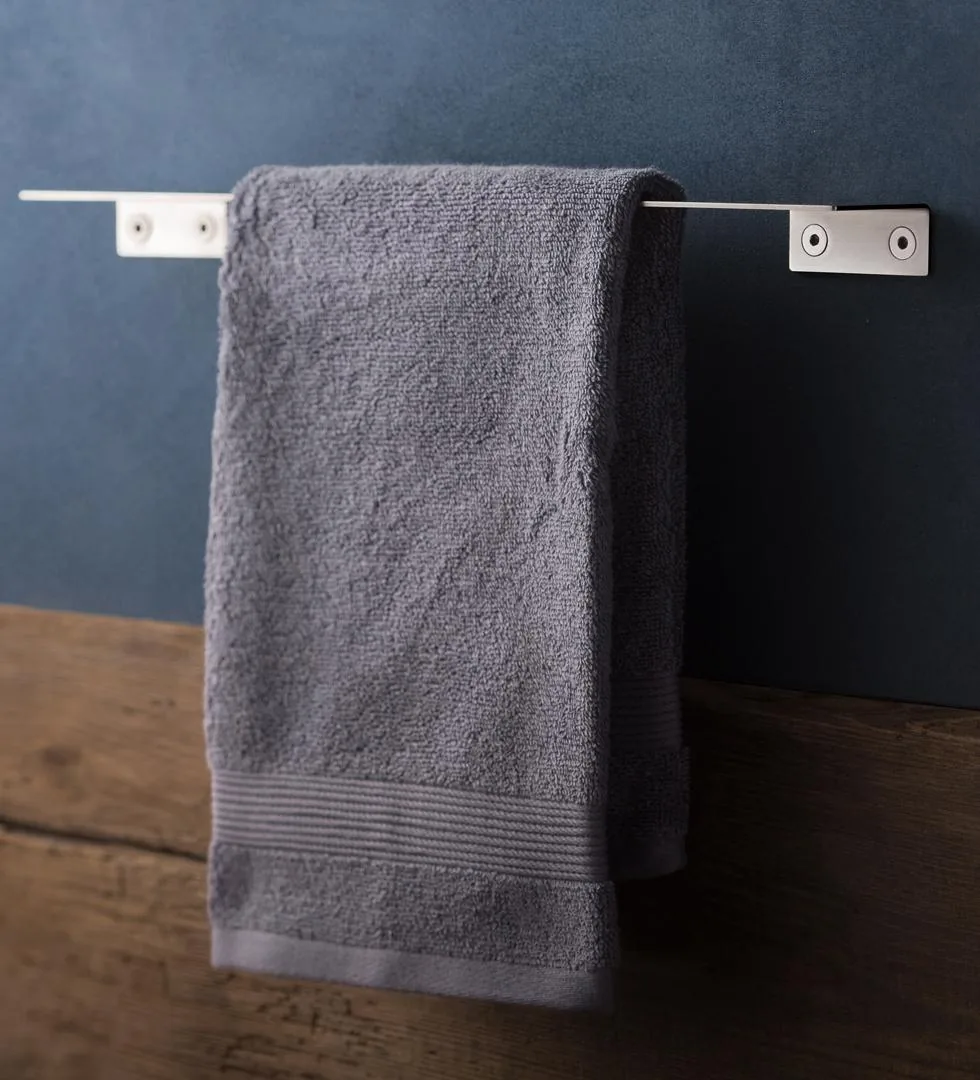 ProductWall mounted towel rail, 320 mm2MS3795-BSFixed 320 mm bar in AISI 304 stainless steel; the projection and fixing detail are not recorded, so take them from the selected product's own data.View in catalogue →
Where a room needs a garment hung rather than a towel folded over a bar, the FONTEA combinable coat and robe hanger fits a short garment rail to the wall hook of the same range, so one fixing point does two jobs. That is a jointed assembly, so square it up before anything is hung on it and record the combination method with the handover pack.
Robe hooks
A hook is compact, but compact does not mean low risk. A robe or towel is pulled sideways as it is lifted, and a hook near a shower or door can be knocked. Provide backing at each planned hook position and check that the rosette or mounting plate sits flat on the finished surface.
The FONTEA wall-mounted robe hook is published in AISI 304 stainless steel with four finishes, inox spazzolato, deep grey, oro and Tinta. Its page states plainly that the load rating and fixing detail are not recorded, which is the point worth taking from it: those are product characteristics, not a published load rating. Specify the backing and fixing for the intended use rather than inferring capacity from the hook's size. The same page tells the installer to screw the hook to a structural wall or suitable backer rather than to tile alone, which is the reason a hook position is a backing decision at first fix rather than a drilling decision on handover day.
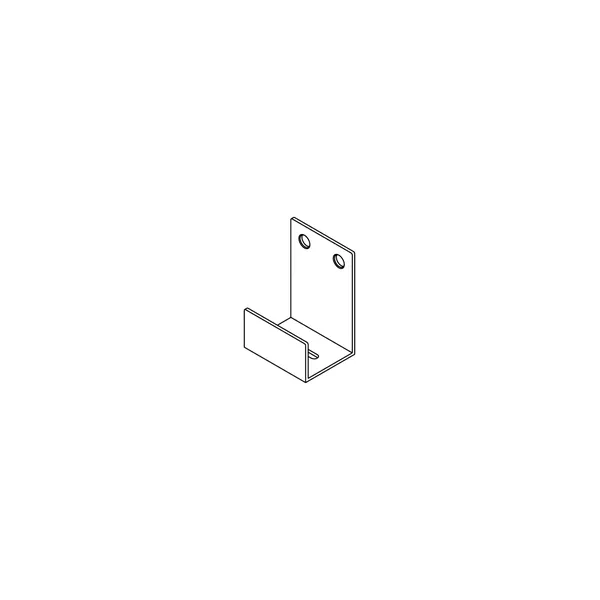 ProductWall mounted robe hook in AISI 304 stainless steel2MS3781-BSAISI 304 stainless steel, four finishes; load rating and fixing detail are not recorded, so specify the backing and anchor for the intended use.View in catalogue →
Shelves
Shelves need a different review because the load sits away from the wall. The front edge increases leverage on concealed brackets and fixings. A shelf in a shower or beside a basin also needs a surface, sealant and drainage detail that does not trap water against the wall.
Set out the bracket or fixing plate from the manufacturer's drawing. Extend backing across the complete support zone, check the shelf will not conflict with concealed services, and coordinate the waterproofing detail before drilling. Do not treat a decorative shelf as suitable for a person to lean on unless it has been designed and specified for that use.
Make installation inspectable before handover
A sound installation has two inspection points: before the wall closes and after the accessory is fitted. Use both.
Before boarding or tiling
Confirm the room reference, template, backing, service clearance and photographs. Measure from fixed points such as a structural corner or finished floor datum. A photograph without a dimension can show that timber exists but not where a future installer should drill.
After the finished wall is ready
Transfer the approved centre lines without relying on a pencil mark that will disappear. Check the drill method for the tile and board system. Seal penetrations where the wall build-up requires it, and do not crush tile edges or waterproofing layers by over-tightening the mounting plate.
At final inspection
Look for movement at each wall post, hook or shelf. Check that the rosette sits flat, the accessory is level, the finish is undamaged and water cannot sit behind the fitting. Record the installed SKU, finish, fixing method, care sheet and replacement route in the handover pack.
For a hotel, keep one room's approved installation as the reference mock-up before rolling the detail across the floor. For rental properties, leave the owner or operator a plain record of the backing locations and the care instructions for the exact finish.
Rental and hotel operating conditions change the brief
A hotel bathroom needs repeatable installation and replacement. Standardise the accessory schedule by room type, record the approved fixing detail and keep spare references with the facilities information. Housekeeping teams should know which cleaners suit the finish, but cleaning instructions do not compensate for movement in the wall fixing.
A rental bathroom needs a detail that remains understandable after the original installer has left. Mark backing locations, keep the product reference, and avoid a repair plan that depends on a proprietary part no one has recorded. If a tenant or maintenance contractor may replace a hook or rail, the handover record should identify the substrate and approved anchor type.
Exposure also matters. Our guide to 316L accessories for coastal and seafront properties explains why chloride exposure, fixings, crevices and cleaning should be assessed as one assembly. For an inland rental bathroom, do not specify a marine-grade fastener by habit. For a seafront project, do not specify an ordinary fixing without checking the environment.
Practical specification checklist
Before releasing an accessory package, confirm:
- Approved accessory, finish and product reference
- Room location, finished height and fixing centres
- Wall build-up, board and tile thickness
- Backing type, extent and inspection responsibility
- Anchor, screw, material group and required embedment
- Service and waterproofing clearances
- Manufacturer installation and care instructions
- Photo and measured record before wall closure
- Post-installation movement and finish inspection
- Handover record, replacement reference and spare strategy
If a detail is missing, mark it as unresolved in the schedule. Do not let a provisional accessory image become an assumed fixing design.
Frequently asked questions
Can a towel rail be fixed to plasterboard alone?
Only when the selected product and fixing system explicitly allow that substrate and intended use. For a repeatedly handled rail, provide designed backing where the partition and accessory details call for it. A generic hollow-wall plug is not a universal answer.
Should bathroom accessory fixings be 304 or 316?
Choose by exposure, substrate, product instructions and the complete assembly. A2 and A4 are useful shorthand for 304-family and 316-family fasteners, respectively, but the BSSA notes that the groups are not exact alloy identities. A4 or 316-family fixings are a sensible direction for coastal or chloride-influenced conditions when the project detail supports them.
Are robe hooks and towel rails safety rails?
No. A decorative hook or towel rail should not be used as a grab rail or other support. If an accessory is expected to take body weight, specify a purpose-designed support with its own structural detail.
How do you prove backing exists after the wall is closed?
Photograph the open wall with a tape measure and fixed reference points, then store the image with the room elevation. Record the backing extent, wall build-up and accessory fixing centres. The record helps future maintenance, but the installer still needs to follow the selected product and partition instructions.
Specify the wall before the accessory
Reliable bathroom accessories start behind the finish. Coordinate the wall build-up, backing, fixing centres, services, waterproofing and product information before the first board or tile is installed. Then inspect the open wall, record it, fit the accessory to its approved detail and include the result in handover information.
For a hotel, rental block or multi-room refurbishment, send FONTEA your room schedule, accessory quantities and finish requirements through the contact page. Browse the bathroom accessories catalogue once the wall and fixing brief is clear.
Specify it from the catalogue
Every fitting mentioned here is stocked and specified in the FONTEA trade catalogue: full technical data, finishes and wholesale tiers.
Related reading
-
 Accessories
Black PVD stainless steel bathroom accessories: a UK specification guide
Black PVD gives bathroom accessories a dark architectural finish, but approval should cover the stainless grade, coating evidence, fixing details and cleaning regime.
-
 Commercial projects
Who Buys Bathroom Accessories on a Build-to-Rent or Hotel Project?
Assign accessory selection, procurement, backing, installation and handover responsibilities explicitly across FF&E and construction packages.
-
 Maintenance
Housekeeping and Stainless Steel: Which Cleaning Chemicals Damage Bathroom Accessories?
Create a practical cleaning protocol for stainless bathroom accessories that controls product choice, dilution, contact time, rinsing and escalation.